Showing posts with label handmade. Show all posts

Thursday, August 18, 2011

Vintage Sheet Blanket

 I was burning some time on pinterest and saw this super cute photo of a baby quilt made out of vintage sheets.  I thought to myself Hey-I have alot of those and it looks simple enough that I might could do it once P went down for nap... so...that's exactly what happened...

I found a bunch of sheets that didn't necessarily match -what fun is that- and started cutting.  I had no rhyme or reason as to what exactly I was doing other than that I had a vintage square napkin, cut that into 4 and there was my pattern.  I used that square to cut the rest of the squares (30 total-roughly 4 of each design)
5 squares in width and 6 squares in length.  Finished product came about to be 40" x 48"

 Next I took all the little squares so sewed them together-first across and then down. 
Once I got it all sewn, I laid it onto another sheet and cut backing.  To make it think I used batting and sewed it all together.  I also added some vintage lace I got from my grandma to give the edges a more complete look.  


And done-all before she woke up! I am happy her room has a little more flair and a homemade touch :) 


Saturday, August 6, 2011

Onesie making for my little guy

 I'm getting really excited about him can you tell? ;) I have several ideas brewing that I want to make and do for Finley...my form of nesting I suppose... 

I took the opportunity to go out for the afternoon to have some alone time since Paul needed to get some work done in quiet here at the a.p.t. and Piper was sleeping.  I went to Tuesday Morning and found these iron ons for just $0.29 a piece! Heck yeah! 

I knew I had a few white onesies at the house that I wanted to do something just like this with so I checked out and headed right home to work before P woke up from nap... Super simple project and I'm very pleased with the outcome... 

Here's how it all went down-

 
 Materials- white onesie and iron ons (iron and ironing board)
 Cut out your letters
Arrange on onesie
 Use on wool setting and press front then back for about 10-20 seconds each.

Peel plastic off and done...LOVE how it turned out.  I can't wait to make more.   Do you guys have any ideas for cute wording on baby onesies? 
PLEASE SHARE! Thinking of an idea was the hardest part of the project!

Thursday, August 4, 2011

Making Lemonade- DIY Dress

We've all had it happen to us in one way or another, and if it hasn't yet it will.... Ruined clothes!  Take a look at my brand new $20 tank top.  I was given a gift card to Motherhood Maternity and thought I might use it to get some clothes.. I ended up buying 2 dresses and 2 tank tops.  Here's one of the tank tops.  I loved it because it was flowy and light and brand new.  I wore it once.. and then I washed it...and when I opened the washer it was wound so tightly around the agitator that I couldn't get it off.. Paul came to the rescue and gently got the shirt off the agitator.  And then I saw it...RIPPED! I was so sad.  It got looped around the agitator in the wash and RIPPED the top of the shirt...SEE?


So..I got really upset..because I hardly ever buy clothes for myself brand new much less spend $20 for a tank top and I'm frugal so don't judge my upset-ness. Sweet Paul immediately thought..Hey you can make P something...so I did...

I took a dress she already had and used it as a pattern to cut the shirt to her size.  I left the edges raw because it's T-shirt material so it won't fray.  So the only sewing I did was up the sides to close them and the detail on the front.  
For the detail on the front I used thin elastic and wound it around a bobbin and popped it in.  Cut 1 1/2 inch wide strips from the scraps and then sewed them on and the elastic kind of gathered it together for me...I did 5 or 6 strips close together. I then tied a knot at each shoulder to close those.  And that's it. Easy Peasy.

Wednesday, December 29, 2010

Mustache Mania-DIY

Mustaches fake, anyway have made a big comeback! Why? Well I'm not exactly sure, but it does make me laugh when an unexpected mustache sneaks in and surprises you!

Like this:
photo stolen off of facebook :/ sorry Anna :)

Anyway...with this awesome inspiration I decided to make little unexpected mustache shirts for my nephews..

Take a plain shirt like this one, (target for around $5 bucks)

-and rip the seam on one sleeve 3/4 of the way up.

- use a template similar to these and cut some fabric + felt out in that shape.
(i used felt backing to make the applique a little stiffer for sewing on)


- turn your sewing machine to a low setting 0 or 1 to form a tight stitch.


-sew all around the image on the sleeve of the shirt

-turn inside out and sew sleeve seam (if you have a serger, use it in this step!)

-walla! mustache shirt! i dont have a good picture of the shirt because of slight frustration and time restraints but here's a look like the one i was going for.
and here's a little peek at the actually shirt


- i also made a little mustache knitted hat for Piper's favorite second cousin!
sorry no picture of that either :(
image sources:

Tuesday, December 28, 2010

DIY Dress Up Doll Board


I Hope you all had a very Merry Christmas.  Around here, Christmas is always quite the adventure.  But I would have to say my most favorite part was making and giving this Dress up felt doll board to my niece, Georgia.
 
You can find the tutorial here.
I tweaked it just a little in order to use some things i already had, so my board is a little smaller.
I also added fabric to some of the pieces to give the clothes a unique look.


You can also buy printed felt to use to make the "outfit" extra cute! 


I loved this so much and wanted to share~ You may have a little girl of your own to make this for or you might just want to play with  it yourself i caught myself a few times changing the outfits ;)

Come back tomorrow to see what I made the little boys in my life for Christmas :)
 

Wednesday, December 1, 2010

DIY baby legs!


Do you have an old sweater?
Up-cycle that old thing!

Materials needed:
-An old sweater
-scissors
- a paper towel
-a sewing machine or needle and thread for stitching


Even if you cant sew you can for sure do this~ Quick15 min or less project!

Step 1:
Place the paper towel on the backside of the sweater and cut around it, using it as a pattern.


Step 2:
Fold in half and cut. These are your two pieces

Step 3:
Fold in half again right sides together and use a sewing machine or hand stitch a straight line to close the open side.


Step 4:
Turn right side out and there you have it~ Put them on a special little one in your life and snuggle! 


Size for pattern fits 0-12 months, for bigger sizes adjust accordingly.


Tip:  The bolder the sweater, the cuter the baby legs! Look for bold choices that can be found at any thrift store!


Also this will make a great and practical gift idea for the little ones in your life.  Make a few pair!

Monday, November 22, 2010

Craft Show

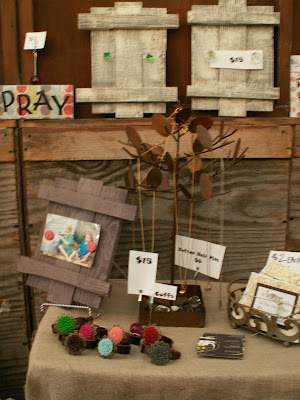
This past weekend my sister and I did a craft show in Baton Rouge.  It was our first big show so I was a little nervous to put myself out there.  i have a weird fear of rejection, i know right, im the only one on earth that struggles with that :) We learned a lot, met some people, and have some contacts so it was a good learning experience. We had lots of positive comments about our booth and even some loyal customers that came BOTH days to visit us. 

Here are some pictures from the weekend


Little P was a trooper all weekend.  She was there almost the whole time both days!

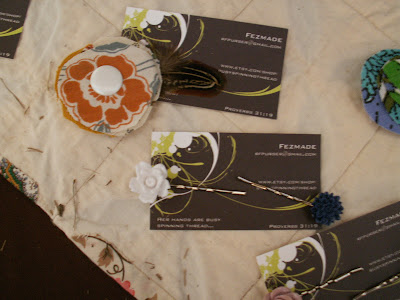
*Magnetic picture frames and flower cuffs are still available.  Let me know if you're interested.  I hope to add more items to the shop soon too!